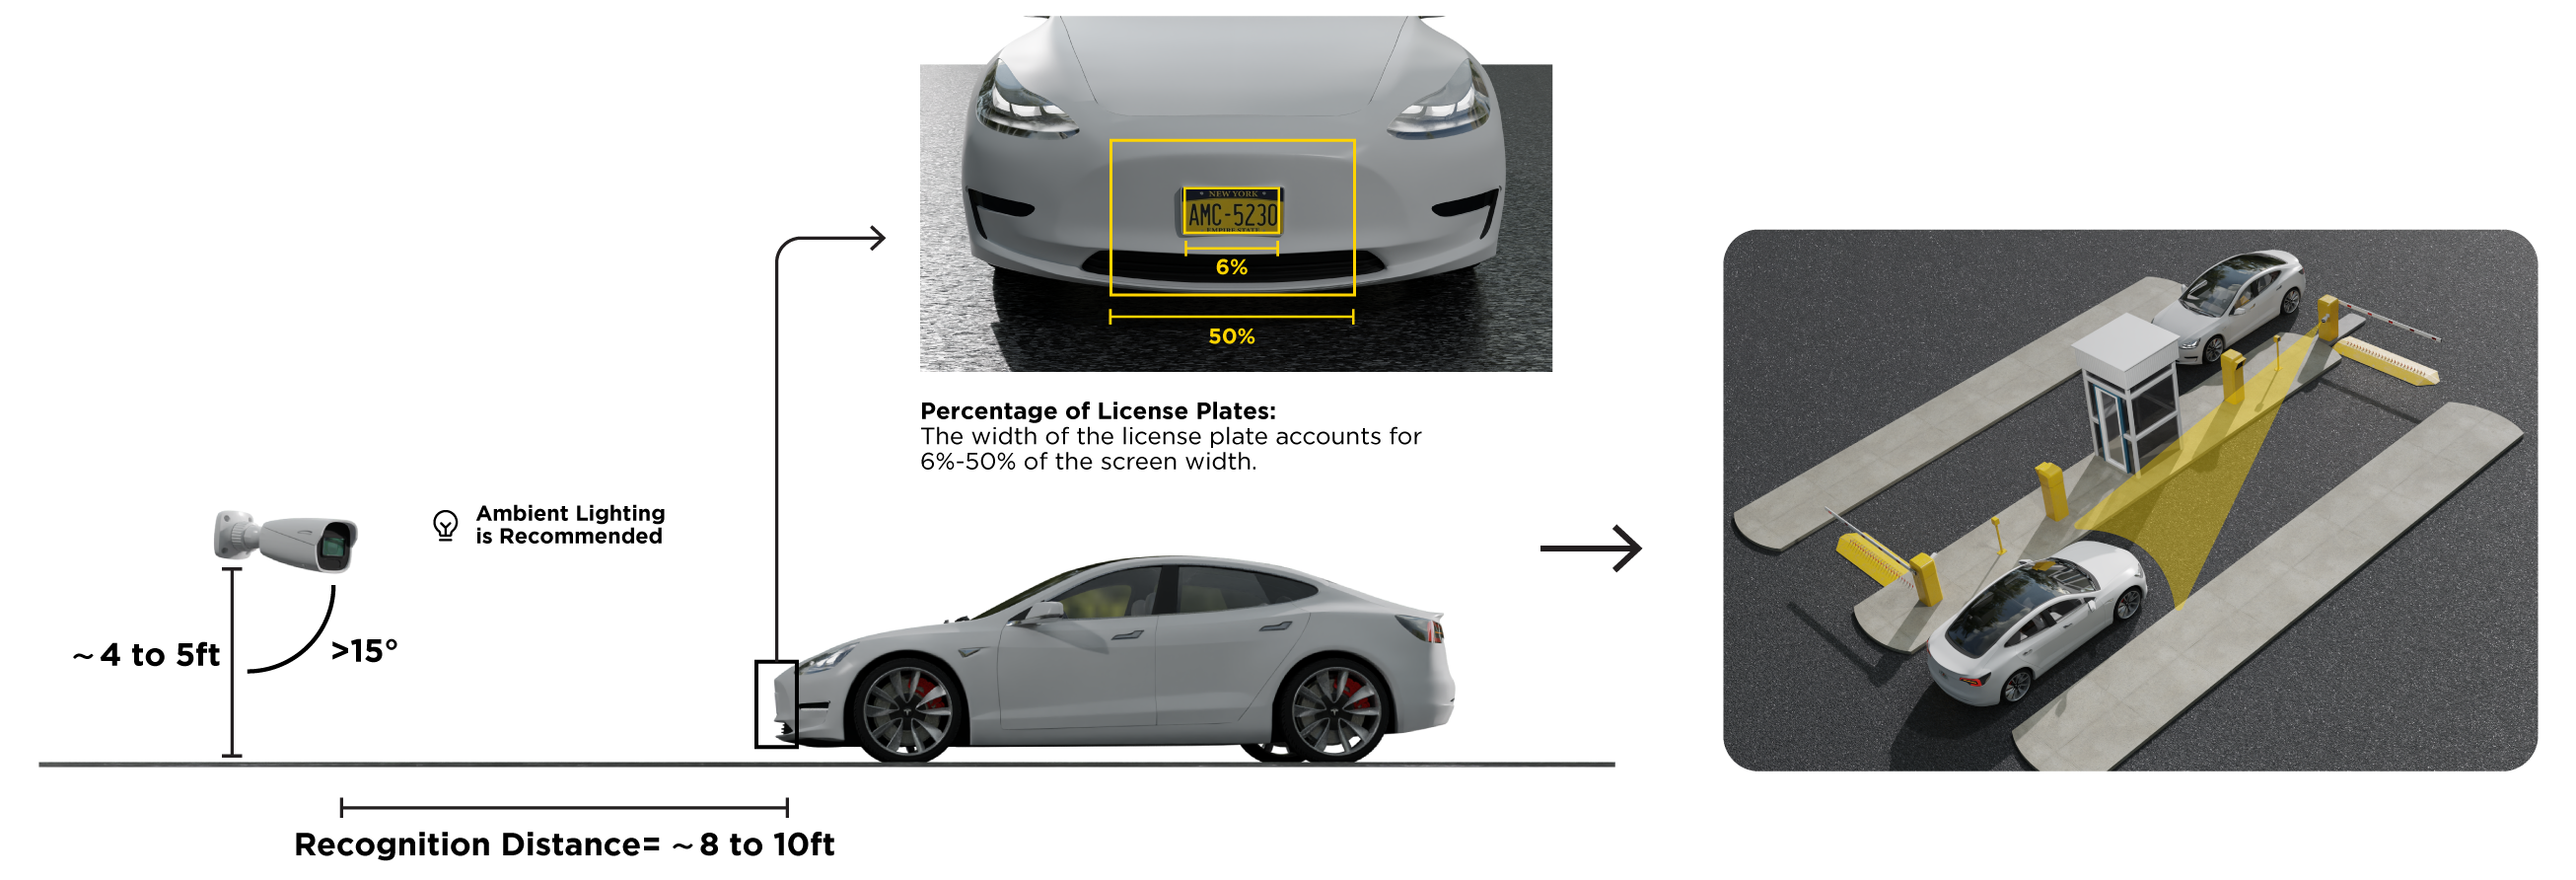
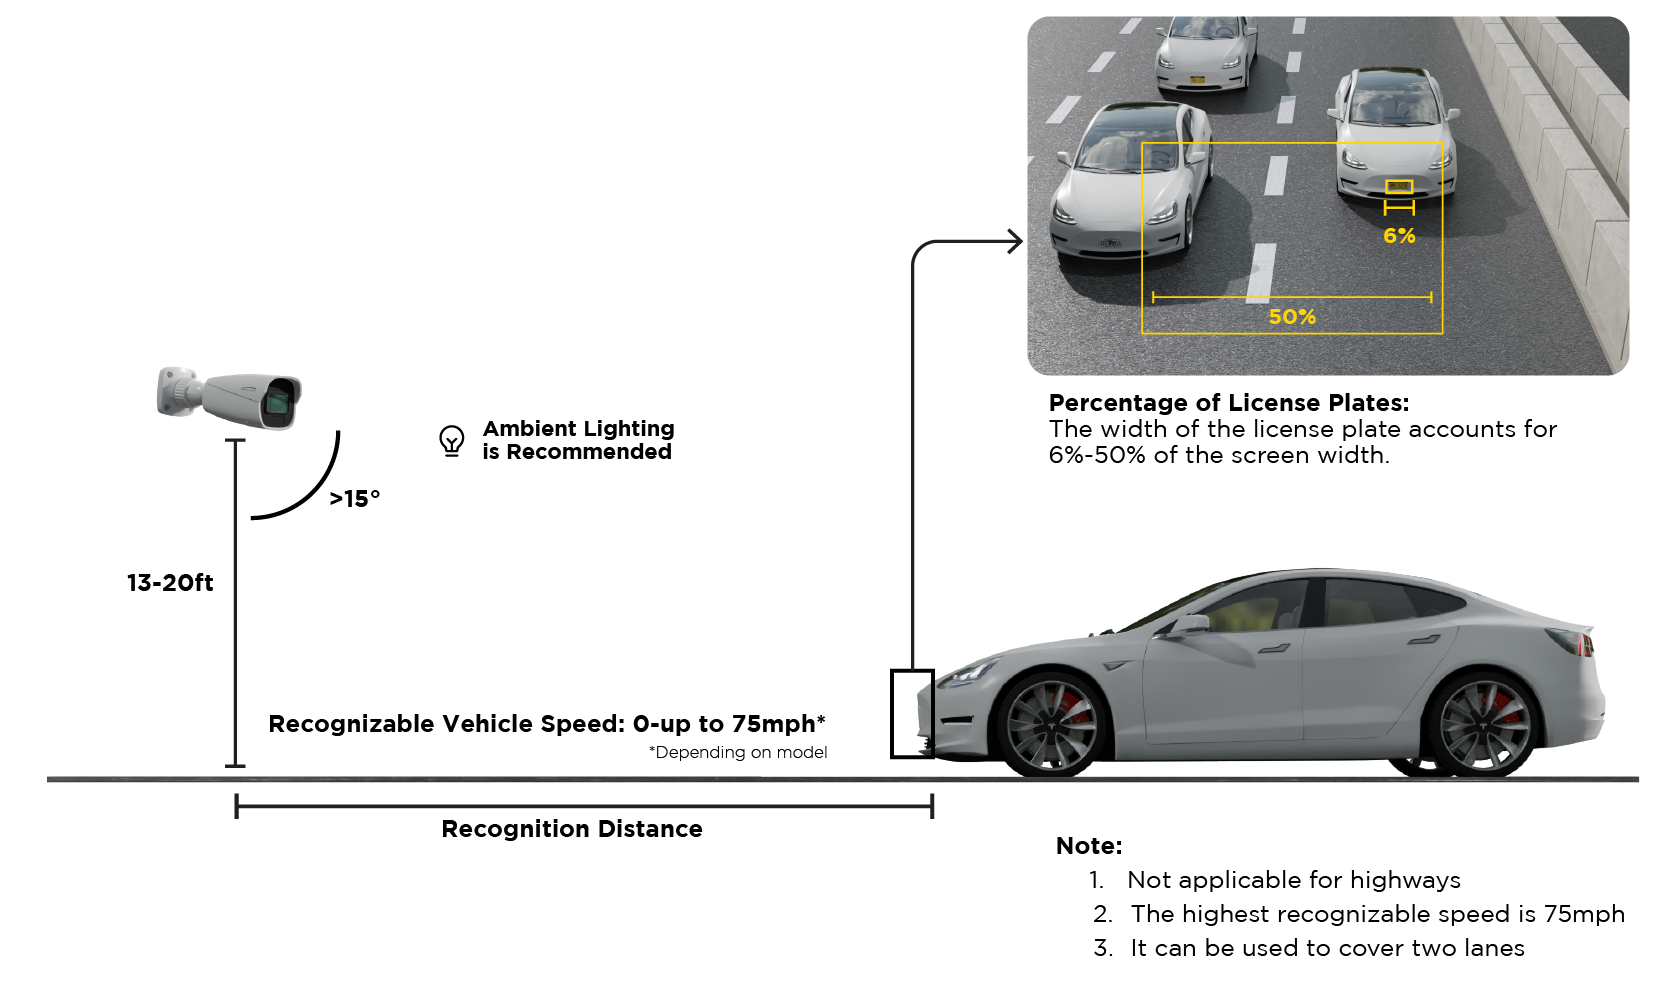
Note: The following installation requirements are based on optimum conditions, your license capture rate may vary depending on speed, lighting, position, license plate designs and other factors.
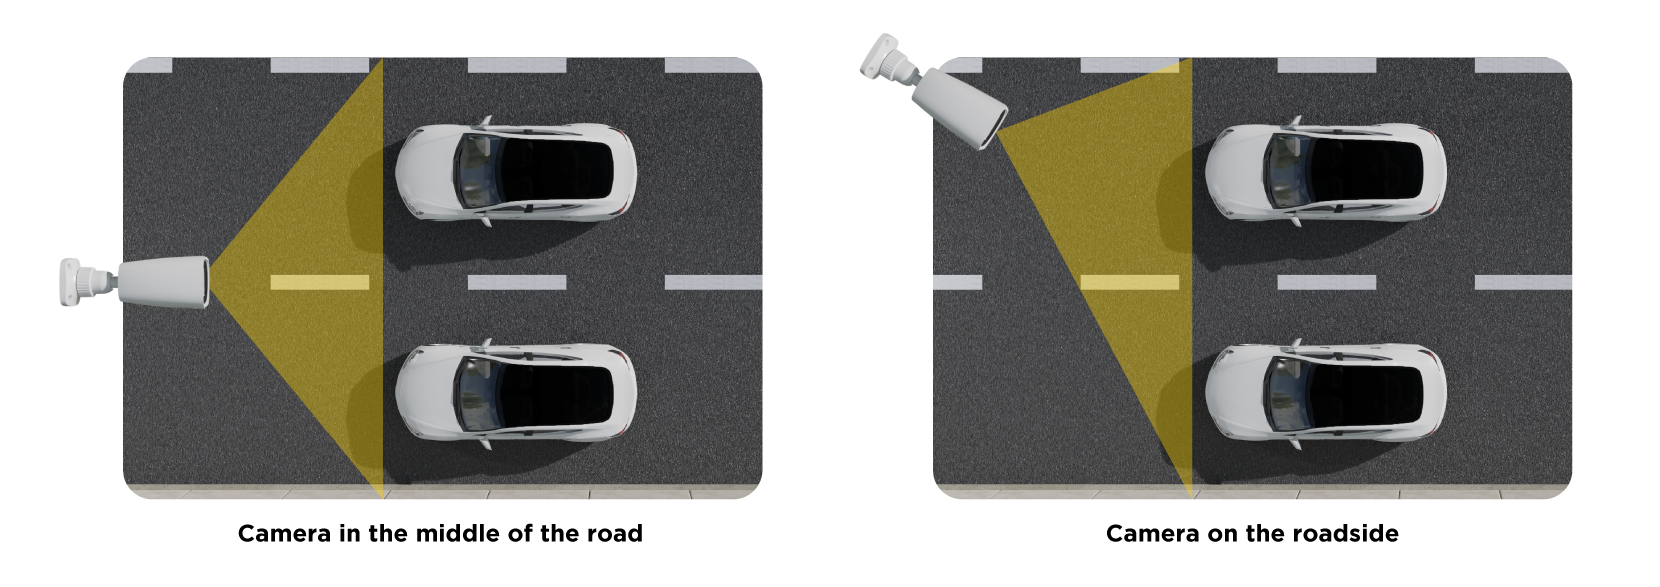
Position the camera so that the scene will cover the lane, vehicle and vehicle’s license plate.
Try to avoid the objects that will block the camera, such as pillars, obstacles, doors, etc .
Avoid the scenes with too many moving objects that may interrupt the line of the sight (like people, non-motor vehicles, foliage/trees).
Requirements
Percentage of License Plate
The width of the license plate accounts for 6%-50% of the whole image width.
Fill Light
Keep enough distance to minimize overexposure on license plates.
Installation Angle
Depression Angle of ≥15°. Avoid the influence of car lights.
Installation
1) Entrance control
2) Road Surveillance
dcbsdhjbcjhsbdhjcbsahjdbcajshdbc
Overhead
Entrance/Exit
Lens Type
Recommended Installation
Height
Recommended Recognition
Distance
Recommended Installation
Height
Recommended Recognition
Distance
7-22mm
15~20ft
23~98ft
4.2~5ft
8~ 10ft
5-50mm
13~20ft
16~164ft
4.2~5ft
8~ 10ft
8-32mm
15~20ft
23 ~ 115ft
4.2~5ft
8~ 10ft
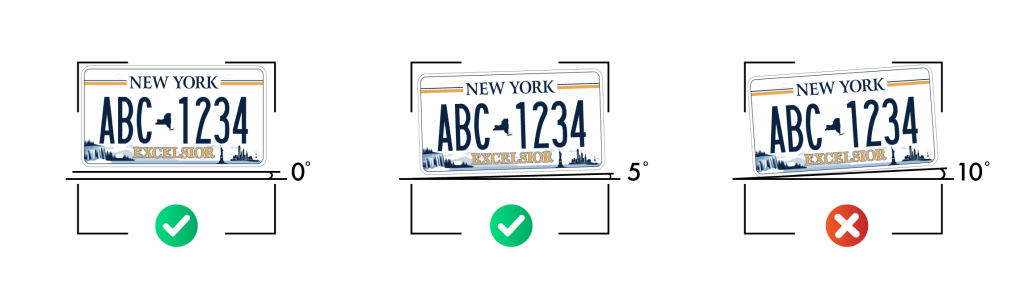
The Tilt Angle of the License Plate
After the camera is installed, you can log in the web client and view whether the license plate tilts in the video. The tilt angle should be as level as possible and not tilt in either direction over 5°.
Capturing plates in low light
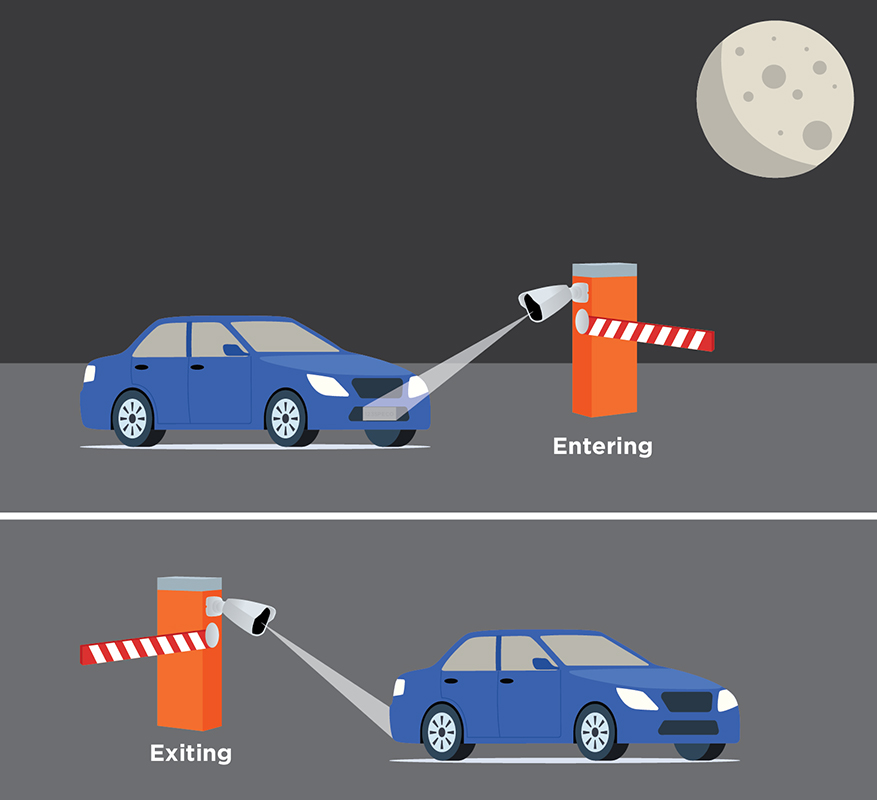
It is recommended to have separate cameras for entering and exiting due to the difference in lighting as vehicles entering will have headlights on and vehicles exiting will not.
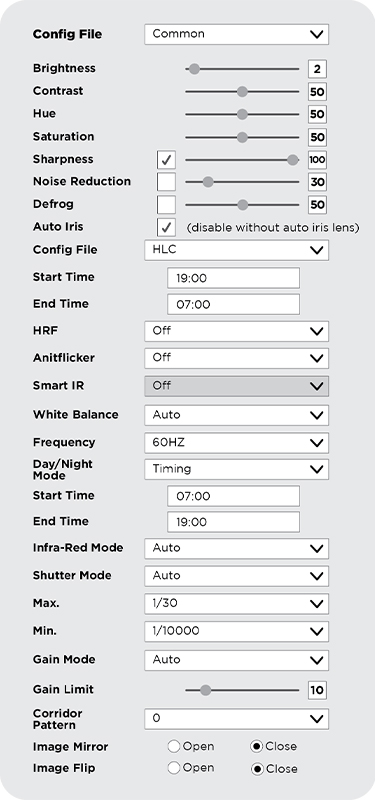
Settings are for reference. Results may vary on lighting conditions and environment
For night time capture of plates entering, it is recommended to have the settings below.